|
Your faucet utilizes the system of valves and handles to control the temperature and stream of water in your bath or shower. Much of the time, faucet issues come from one of these parts. Supplanting or repairing a faucet isn't difficult. However, the procedure will fluctuate in light of your valve and the idea of the issue. Here's are some advice for your faucet or valve for an assortment. On This Page: 1. Steps to Replace/Install Faucet by Type 2. Single-handle/Single Valve 3. Double-handle 4. 3-handle 5. Ball or Thermostatic Faucets 6. Additional Considerations 7. Repairing a Leak 8. Esthetics 9. Hiring a Pro 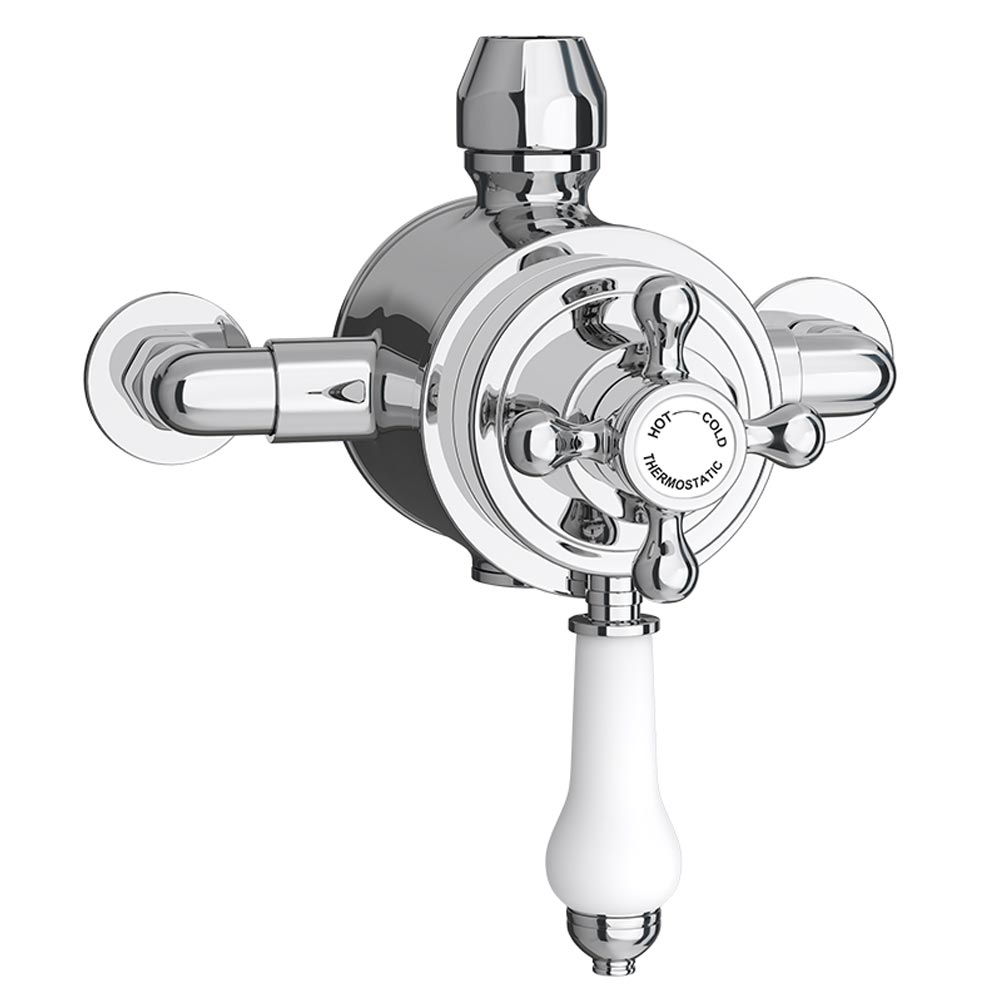 Additional Considerations The most effective method to Replace Valves by Faucet Type
Critical note: Be sure to kill the water before you start. If you can't discover the valve that turns off the shower, kill the water to the whole house. Then turn on the shower and let the pipes drain out. When you walk out on, turn on the greater part of your taps to compel out any air that may have gotten in. At the point when the water stream is enduring, you're finished. Single-Handle Faucets Usually found in single-handle faucets, valve cartridges are barrel-shaped gadgets that utilization O-rings to control the stream of water. Replacement is the least demanding approach to settle cartridge-related issues.
Two-Handle Faucets Normal in two-handle faucets, stems are components that utilize strong handles and elastic seals to open and close water lines. Introducing another stem is the most straightforward approach to settle a glitch, yet you can an additionally replace defective equipment like seals and O-rings.
Three-handle Three-handle faucets have temperature stems and diverter stems. Here's the manner by which to repair both: Tools:
Ball and Thermostatic Faucets Ball and thermostatic valves will require the assistance of an expert. These faucet plans use muddled outlines that aren't as DIY-capable as stems or cartridges. Additional Considerations The flawed diverter in your gush will influence the proficiency of your shower. Supplanting your tub's gush is the simplest method to take care of this issue. Here's a how-to: Tools:
Repairing a Leaky Faucet It's typical for your shower to trickle for a couple of minutes after the water is killed. Be that as it may, an enduring stream may show a hole. Supplanting your flawed equipment is a typical fix. However, breaks can likewise be ceased by repairing your valve or stem. Here's a snappy summary of basic repairs. The majority of issues come from a flawed valve or segment. Awful O-rings and flawed seats and seals are repairable issues. Much of the time, supplanting the harmed equipment is the ideal approach to enhance the issue, however tenderly dousing and scouring cartridges or stems can remove development and enhance its fixing capabilities. Esthetics Once in a while, a basic faucet and handle update is all that is expected to give your washroom a fast facelift. You may do this for a deal, or you may simply be worn out on taking a gander at a similar style. Notwithstanding, the obsolete equipment can destroy the appeal of your restroom even after an aggregate rebuild. At the point when to Call a Pro Try not to hesitate to call a star if you're uncertain about any piece of your faucet repair or establishment. DIY slip-ups can prompt major issues like breaks and flooding. Additionally, disasters can decrease the vitality effectiveness of your home, bringing about expanded utility bills.
0 Comments
Keeping the tabs when you have done the work to your car can be a pain. I like to keep my receiving receipts in the glove chamber. So I can look through them when I'm in the car if I need to, yet that's no good filing framework—you could do similarly also scanning your maintenance receipts and putting them into Dropbox or Evernote, or whatever other note-taking apparatus you favor. If you're searching for a more portable option, however, one that gives you a chance to perceive what you've had done as of late, so nobody tries to upsell you on work you don't need, here are a few apps to try: • Road Trip (iOS) is presumably a standout amongst the most powerful mileage and maintenance tracking apps for iOS available. Tracking fill-ups and mileage is super-quick, as is adding maintenance history, costs, and reminders for future work. The application has a tire log to track summer and winter wear on your tires, and backings different vehicles like pontoons and bikes. You can track the same number of vehicles as you like, as well. The lite version gives you a taste, yet the full version will set you back $5 for the iPhone or the iPad (it's not a universal application, so you'll need to get it twice for the two stages).  • Car Maintenance Reminder (Android) is a free application that will monitor your fuel efficiency, cost, and mileage, yet additionally gives you a place to track the majority of the maintenance and repairs you have done to your vehicle. You can include notes, costs, and obviously, get notifications and reminders when you ought to complete some work. Read more advice on how to maintain your car. • Auto Care (iOS/Android): Auto Care has been around for some time, and completes a pretty great job of tracking your vehicle's maintenance history, mileage, repair history, service expenses, and then some. You can use it to remind you when it's time to complete something specific so you won't overlook. Besides, it bolsters multiple vehicles. • Car Minder Plus (iOS) is another great, simple application for tracking your mileage and your vehicle maintenance. You get presets for things like oil filters, air filters, belt inspections, and oil changes, and you can enter in your maintenance work and costs to the log to monitor what you've had done. From that point, enter in your service intervals, and the application uses simple red/yellow/green indicators to reveal to you when it's time to complete that work. The application will cost you $3. • A Car (Android) is free, and a standout amongst the most famous Android apps for tracking vehicle maintenance and mileage. Tracking fill-ups and mileage is quick, entering in your maintenance history and costs are simple, and you can even enter specific notes or information about parts you lean toward or that your vehicle requires. The application notifies you given time as well as mileage when you ought to have work done and underpins custom notifications. aCar Pro includes multiple dialects, home screen widgets for quick access to information and logging, and connections to other prominent car apps and websites, just for $6. You take pride in your recreational vehicle and need to keep it looking awesome for a long time to come. The sticker price of RVs is high, which gives you more reason to take unique care of your speculation. So amid the offseason, when you're not traveling around in it, you have to guarantee you store it appropriately. There are diverse ways your RV could wind up damaged while lounging around sitting tight for its next ride. Along these lines, utilize the accompanying RV storage tips to guarantee your vehicle remains fit as a fiddle. 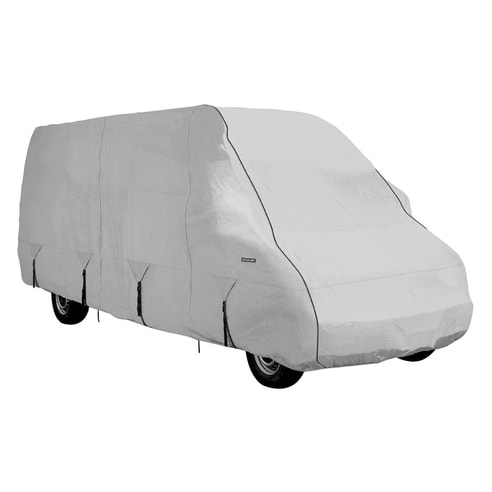 1. Protect It From Pests Envision going into your RV after a winter break and discovering mice, roaches, and other sickening nuisances. Without a doubt, you'd be extremely disturbed. Luckily, there are ways you can protect your RV from these critters. For example, you can make it more troublesome for them to get in. One path is to quit for the day roof and apparatus vents in the wake of killing the gas. Then, after you have switched out the channels to the AC unit, simply cover it up. And in case you're physically fit, you should check the unit's undercarriage to guarantee no holes or free boards are available. These could conceivably enable rodents and bugs to get inside. Lastly, wipe out the RV, so there are no nourishment, beverages or scraps. It's extremely normal for ants to get into homes and RVs amid the best rv cover for winter. The winter weather can damage Paint finish of your car. it,s very dangerous. How to use the rv cover storage click our link for more advice. 2. Give Your RV A Deep Clean Regardless of whether you aren't stressed over nuisances, it's as yet critical to complete a profound spotless as a component of your RV storage routine. Like this, when spring moves back around, you can bounce right in and ride out without stresses of cleaning up. With a specific end goal to prep your vehicle, you'll have to wipe out the ice chest, cooler, washroom and vents. Additionally, make a point to wipe off the counters, tables, shelves, and floors. On the off chance that you have a microwave or stove, wipe those out as well. Utilize a useful cleaner to help keep the development of shape, particularly in dim places like your cupboards. Every little apparatus ought to be stopped utilizing the LP supply valve and principle breaker. 3. Choose RV Storage That's Dry This is critical, as your RV could be powerless to shape development. Dampness is a major foe of RVs placed in storage. It can likewise cause smelly scents, which can be difficult to dispose of. The way to keeping your RV dry is to guarantee the seals and ventilation are great. You can do this by checking the outside creases to check whether there are any breaks in the caulk or silicone. Provided that this is true, you can repair them yourself or contact a specialist. 4. Keep the Tires in Good Condition The tires of your vehicle are imperative for evident reasons. Thus, you have to guarantee they have arranged appropriately before leaving your RV in storage for quite a long time at any given moment. Check the weight of every one of the four tires. Check the client's manual to discover the producer's prescribed weight. Amid the winter, store your RV on a surface other than asphalt and cement. When these achieve sub-solidifying temperatures, it can damage the tires. An alternative is to place a bit of plywood underneath that is more extensive than the tire. Tire chocks ought to be placed in the front and back, alongside tire covers square UV damage. As a dependable guideline, you should move your RV once like clockwork. 5. Use Translucent Daytime Shades It might seem like a smart thought to utilize evening time shades on your RV windows. Be that as it may, this will make it harder to battle form development. Your most solid option is to run with translucent daytime shades. Along these lines, daylight can get inside. Keep in mind; form needs dampness, obscurity, and Food. 6. Protect Your Battery The last thing you require is for your RV battery to kick the bucket while in RV storage. To keep your battery from kicking the bucket, you have to kill all power. And the ideal approach to do that is to utilize a battery disengage switch. This can be found on the right side of the battery. When you kill this, it'll keep your battery from being depleted. On the off chance that your battery is completely charged, it will survive the winter. Be that as it may, if it's frail, it could easily solidify. 7. Retract All Slide Outs You don't need certain parts of your RV to has presented to the components. This incorporates your roof, mechanical parts, elastic seals, and slide toppers. Make a point to clean these areas. A while later, utilize an elastic seal conditioner and slide rail consumption protector. When this is done, it will help keep spills from happening. 8. Install Vent Covers Your ventilation frameworks put your RV in danger of dampness development and shape development. It's a smart thought to leave the vents on the rooftop open. This will enable air to move through without prompting irritation and form issues. So you need to expel a course from a bar, yet don't claim a direction puller tool, or it essentially simply doesn't fit. On a side note, however, if you don't have to expel the sponsored piece, I wouldn't evacuate it. The magnet itself is fragile, implying that if it falls on a hard floor or pulls in rapidly to a solid bit of metal, it can break or much smash which can be unsafe. So, if you have to make the magnet more slender, don't stress over it excessively. Step 1: Bearing Removal? Sledge Stuff through the Space between the Jaws! Open your vise jaws, and place the bearing over the jaws as I appear in the second picture, and close it gradually until the point that you achieve the point where the pole can barely slide from side to side in the vise jaws. This is essential since if you don't ensure that the inward race is the thing that ingests the weight from the blow of the sled, the bearing can break, making it useless if you need to keep the bearing like me. Then, to drive the bar out of the bearing, I get a kick out of the chance to use a middle punch and a mallet and sled gradually and carefully.  Step 2: Denial Wood Faster! Unless we're discussing a monstrous 72ft 2X4* that you have to lift alone, I've discovered that a vise works route superior to a locking forceps for expelling nails and staples from wood, and especially in harder woods. It can clutch a minor headless brad nail with much more power, and you have more use for hauling it out. I don't have an ideal case of this since I've as of now de-nailed all of my timber, so I needed to put a nail myself in some piece wood. Get more information about bench vise click here. Step 3: How to Make Magnetic Wooden Soft Jaws Delicate jaws are an awesome expansion to any bench vise, and especially if you're similar to me and work with materials that are gentler than the vise jaws. I like these much more than my past custom made vise jaws. A thin bit of scrap wood, magnets, a Popsicle stick, and some glue is basically what you require for this. These won't move around on you unless you choose not to use them, which for my situation, I store them on the iron block (striking part) or my vise when they aren't required :) Step 4: Crack Open Nuts A few nuts, for example, walnuts are easy to tear open with no tools, be that as it may, some others, similar to Macadamia nuts are difficult to tear open with no tools. I don't figure you can even break them with a sled! A vise, in a nutshell, is way quicker and has more control than locking forceps. Joke proposed, end of step! Step 5: A Simple Way to Mount a Bench Vise Onto Your Workbench Despite everything I have not gotten the waterproof canvas thing that I purchased to cover my workbench when it downpours since it isn't secured extremely well frame the components. I needed to ready to evacuate it in a moment, without objecting around with holding the base nut while twisting to expel the screw... I needed to influence it to penetrate powered! I originally expected on utilizing precisely the same of 3/8" dart for the tapping and the securing to the workbench, since I needed to tap the gaps with a penetrate, and afterward needed to use a similar attachment torque. I later discovered I didn't have the correct connector to use it in my penetrate, so in the wake of boring all four gaps, I needed to do everything by hand (I demonstrate this in the video). Goodness well, it ought to arrive soon from eBay, without a moment to spare to do some quality tests, because these are a path more grounded than I expected :) Step 6: Eliminate the Annoying Clanking Sound! If you've ever attempted to work discreetly to not disturb others, you may know that it is so clumsy to endeavor to turn the handle of a vise rapidly, so the bar remains set up and doesn't create a truly boisterous clanging sound when it falls. Not any longer! I originally thought of putting O-rings on the handle, however then discovered I don't have any, so I chose to use some silicone spacers that I think I rescued from an auto stereo framework. I think they were used to prevent the PCB from rattling around from the vibrations of the auto. However, I'm not by any stretch of the imagination beyond any doubt. Issue settled, and I wish I thought of this before! Step 7: Separate HDD Bases from Their Non-attractive Backs If you've ever dismantled a hard drive, you'll know they usually contain a couple of amazingly solid neodymium magnets, which are useful for all sorts of activities. This amazing idea* encourages you to expel the patron piece from the magnet without hurting its attractive properties with warmth or breaking it, as I've done different circumstances previously. A smoothie is essentially a blended natural product drink and is made utilizing a food blender or smoothie maker (a smoothie maker is only a blender with a tap on the front). Smoothies have soared to prominence over the most recent ten years and are currently a typical and general part of the weight control plans of a huge number of households. In this article, we will take a gander at the nuts and bolts of how to make a smoothie. Smoothies benefit us uniquely in contrast to juices because smoothies contain the entire natural product, not only the juice. This implies smoothies contain the stringy matter of the leafy foods such are great hotspots for our required dietary admission of fiber. Fiber helps help assimilation.  All together for the smoothie to have a liquid like a shape that is drinkable (instead of chew able) the smoothie must have a liquid base. Regular liquid bases incorporate different organic product juices, for example, apple or pineapple juice. Dairy products, for example, milk, yogurt, and frozen yogurt can likewise be used as the smoothie’s liquid base. For this is wishing to maintain a strategic distance from dairy products, there are choices, for example, Soy milk or Rice. You can likewise use water as the liquid base. For more details Visit the site, Empty the liquid base into your blender container, and next include the organic product. Don't hesitate to use whatever natural products you feel like. Banana and strawberry smoothies are prominent however you can use any blend of delicate natural products that you have accessible (products of the woods anybody?). Some harder organic products, for example, Apple will take more time to separate and may leave your smoothie uneven, so you may wish to juice these leafy foods the juice and additionally mash into the smoothie blend. If essential peel the organic product (i.e., citrus organic products, bananas, mangoes and so on) and after that include the natural product at a consistent rate while mixing and mix until the point when the blend has a smooth consistency. You can likewise include ice into the smoothie blend on the off chance that you wish. Another option is to use solidified organic product; this serves to normally cool the drink and also giving the drink a thicker consistency. Check the thickness of the smoothie and include a greater amount of the liquid base if vital (this will rely on your very own essence of how thick you like your drink to be). On the off chance that the smoothie hopes to thin at that point include more organic product or ice and this ought to thicken it up. This is the place most how to make smoothie aides would end yet there is awesome potential for including a monstrous measure of additional sound goodness into your smoothie. There is numerous additional food composes that can be added to your smoothie to give you that additional lift, be it a power smoothie, vitality smoothie, invulnerable framework boosting smoothie and so on. Some usually used and incredible thoughts for solid smoothie fixings include:
For most extreme medical advantage drink the smoothie straight away. On the off chance that you have made excessively then you can solidify the smoothie (abandon some space in the capacity holder as the blend will grow somewhat when it solidifies). A solidified smoothie ought to be expelled from the cooler around an hour before you wish to drink it. Regularly based around a natural product with a liquid base, smoothies as of now have a solid head start as the crude organic product contains a wealth of vitamins, minerals, photochemical, fiber, and chemicals that assistance in our body's development, maintenance, and repair. Smoothies additionally have a benefit that juicer formulas don't give. They hold the filaments of the natural product in the drink thus they are a decent wellspring of fiber which helps to process. Another benefit of having a high fiber content is that smoothies can influence us to feel full for more thus can stop us falling back on 'between dinner nibbling' because of yearning. The way that smoothies were initially well known in California. Where numerous safety cognizant, picture cognizant individuals live is most likely no happenstance. The electric skillet is an uncommon container using electrical energy to warm and mature the nourishments by connecting it to an outlet as opposed to being on the stove. This creation underpins homemakers spare much time as a result of its additional size and less control in cooking. If you possess the best electric skillet, it can thoroughly bring heavenly dinners for your family. In any case, to guarantee that you get every single astounding capacity of the thing, these tips underneath can enable you to ensure your recently procured venture and last time of utilization as far as might be feasible.  Instructions to Use Before utilizing out of the blue, clean electric skillet in warm water with a tad bit of dish cleanser and a non-metal washing cushion. At that point, to brush a layer of espresso on the nonstick surface, warm marginally, wash and dry. You can apply along these lines of cleaning around 10 to 20 times each cooking subsequently keeping in mind the end goal to ensure the nonstick surface of the dish, evacuate smell of paint and wash all the more effortlessly. Next, you should see six stages of utilizing the skillet all the more successfully:
Do:
As per electric skillet's qualities contrasted and others, you can cook various dishes for your family and companions. It is exceptionally marvelous for browned things comprising of chicken, angle, doughnuts, rice, and toasted things including bacon, French toast, frankfurters, flapjacks, potato latkes, pot stickers, flame broiled cheddar, and pot cook… as the electric skillet has the temperature control and it can hold warm superior to the ordinary things. Furthermore, it is additionally useful for a yummy with a few sustenance's, for example, curries, fried eggs, bean stew powder potatoes, soup, calamari, squash blooms, egg rolls and even spaghetti it works impeccably. With electric skillet, you can be inventive to make a delicious menu in your family feast all the more agreeable. Conclusion In the rundown, you can buy this accommodating item to encounter its advantage, yet you should see about how to utilize and how to clean and keep up with a specific end goal to claim it in a more extended time. Also, you can consider and look data about the machines of numerous makers painstakingly before you settle on a choice to purchase the best electric skillet. One more imperative thing is you need to peruse all directions appended to the thing box to comprehend and utilize it all the more viable.  Let's be realistic. Maturing isn't simple, and it winds up noticeably harder after some time. What was the usual day to day jobs?
With something as vital for regular day to day existence, for example, bathrooms and showers, it is fundamental to get in and out of the tub as straightforward as conceivable. The University of Michigan led an investigation and found that over 33% of individuals more than 60 experienced difficulties getting into a shower. Five hints you can use to remain protected, perfect and glad: One. Keep away from elusive floors in the bathroom Before entering the bathroom, the primary contact is with the surface of the shower. Contingent upon the sort of cover if wet it can display a danger of injury. Some preventive measures incorporate the use best non-slip mat and, if conceivable, utilize give drapes additional weight to guarantee that water does not go to the ground. "I prescribe tiles with finished against slip in the shower and the encompassing region, proposes Katie Mallory fashioner. A more straightforward choice is an entryway having a high parallel recorded shower to avoid water through the dirt. Two. Secure yourself against avalanches It's a well-known fact that in a wet shower, mischances can happen. To maintain a strategic distance from this, there are exceptionally basic arrangements that incorporate either a shower mat or non-slip surface in the bathtub.Soap Foam or form in the tub likewise represent a danger of falling. Here we introduce an inventive method to take care of this issue:
Three. Plan your shower Set aside a few minutes when the shower or shower. This will give you enough time to get in and out of the shower without issue and characterize your particular time rhythms. Racing to wash up improves the probability of slipping and potential falls. Four. Give your shower a chance to will help you Enter the tub can be troublesome, and out of it is another story, as per the UM think about. The tub enables the client to get up and out of the container will be smarter to anticipate slips and falls. As indicated by the originator Katie Mallory, the help bars are an "unquestionable requirement" in any shower. These bars ought to be "L" molded or bent outline for simple utilize. Most baths have these bars entryways. A portion of the articles that more seasoned individuals use to get up and out of the tub are seats, las glass entryways and shower window ornaments. They speak to a danger of original injury. Five. Request help !! As indicated by the National Safety Council, 54% of fall-related passings happen in the home. These mishaps are preventable. Mainly having a relative or companion to request help. You can have a cheerful showering knowledge. Furthermore, the establishment of a radio framework can enable you to feel more secure and more secure. Act now! If you like the bathrooms, for what reason not make it simpler for you? Wash up with the security and serenity that you merit. With a couple of straightforward security tips, and including shower embellishments and hydro rub, you will be headed straight toward what you like – sheltered and loose washing knowledge. You May Like More Information, Visit Those Post Essential Things You Need in Your Bathroom Bathroom Safety Tips Make Your Bathroom Safer General Safety Tips For Your Bathroom Bathroom Shower Valve  I am a firm adherent to the energy of a cooked vegetable. Not exclusively can for all intents and purposes each vegetable be cooked thusly — no formula required — yet simmered vegetables are generally pleasurable to eat. Have a critical eater in the house? Need a break from your standard steamed veggie side dish? Take a stab at broiling your broccoli or green beans or cauliflower today around evening time. I believe you're in for a treat. What Vegetables to Roast Root vegetables — like potatoes, parsnips, sweet potatoes, and carrots — are old standbys with regards to simmering, obviously, however, investigate your crisper cabinet and you'll discover a wide range of broiling hopefuls — from crucifers like broccoli and brussels sprouts to shocks like zucchini, onions, ringer peppers, and cabbage. Indeed, even tomatoes can be simmered. use Best Ceramic Electric skillet for vegetable Roast. In case you don't know whether a specific vegetable can be broiled, my suggestion is to simply try it out. It won't wind up being your most loving approach to eat that vegetable, however, it's unquestionably justified regardless of the investigation to discover. Try not to Skimp on the Oil Once you've chopped your vegetables down into nibble measured pieces, hurl them with some great tasting oil. Utilize enough to give the vegetables with a smooth, gleaming covering, however less that you have puddles in the base of your bowl — a tablespoon or two will generally take care of business. Not exclusively does the oil enable the vegetables to cook all the more uniformly and fresh up in the broiler, yet it additionally includes a rich flavor that makes simmered vegetables compelling. I, as a rule, utilize a mellow olive oil when boiling vegetables, however, you could likewise utilize coconut oil, avocado oil, or some other oil you jump at the chance to utilize. Additionally, I, as a rule, hurl the vegetables with my hands so I can rub the oil into the vegetables and ensure they're equitably covered. To wrap things up, hurl your vegetables with some salt. You can include dark pepper or some other seasonings, also. Once more, be liberal, yet not over the top — include enough salt and different seasonings with the goal that each bit of vegetable gets a bit. Give the Vegetables Space Spread the vegetables out onto a heating sheet. You need to see a touch of room around the veggies — don't be hesitant to part them between two preparing sheets in the event that you have to. Swarming will influence the vegetables to steam rather than boil, and that is the opposite we're going for. Additionally, ensure your broiler is great and hot before you put the vegetables into the cook. I think around 425°F is perfect for broiling most vegetables, in spite of the fact that you can modify up or down as you lean toward. Broil Until You See Toast Broil until the point when the vegetables are sufficiently delicate to penetrate with a fork and you see some burned bits on the edges. Gentler vegetables cook all the more rapidly, while harder vegetables like potatoes will cook all the more gradually. Littler pieces will likewise cook more rapidly than bigger pieces. In case you're broiling another to-you vegetable, begin checking after around 15 minutes, and continue cooking until the point that you see burned bits. Those burned bits are what make broiled vegetables so great, so regardless of whether the vegetables are as of now delicate and cooked through, continue simmering until the point that you see the vegetables begin to turn toasty around the tips and edges. If all else fails, cook an additional five or 10 minutes — it's improbable the additional simmering will hurt, and likely that your vegetable will be significantly more delectable. 3 Ways to Roast Mixed Vegetables In the event that you'd jump at the chance to influence a blended vegetable to the side dish, you have three alternatives. Cook vegetables exclusively: First, and most effortless, you can broil the individual vegetables on the particular plate and consolidate them subsequent to simmering. This gives you a chance to screen how rapidly every vegetable is cooking and draw every vegetable from the stove as it's finished. Combine "vegetable companions": Second, you can match together "vegetable companions" — ones that meal at generally a similar rate. For example, you could broil cauliflower and broccoli together, or butternut squash with potatoes. Consolidate these on a similar preparing sheet and dish them together. In the event that the preparing sheet is getting swarmed, part them between two sheets. Broil in stages: Third, you can add diverse vegetables to the preparing sheet in stages — begin simmering the hardest, longest-cooking vegetables to begin with, and afterward include milder, snappier cooking vegetables later on. In the event that the heating sheet begins to get full, split the vegetables between two dishes so you don't swarm them. Plan to have every one of the vegetables complete the process of broiling around a similar time and recall: some additional simmering time is probably not going to hurt.  There are a considerable measure of inquiries with regards to purchasing and storing coffee, however there's a simple answer. Truth be told, the appropriate response is much the same to purchasing crisp nourishment: purchase little sums and purchase frequently. While it might appear time-productive to stock up on a half year of coffee at once, that isn't doing your coffee beans any equity. In any case, clearly we don't go and purchase new beans each other day, nor do the vast majority devour coffee in those sorts of amounts. Which implies that you need to consider storing it. Coffee is a touchy item, nonetheless, and you need to ensure you store it in a way that helps keep its flavor. For storing coffee beans and keeping beans close by, here are some useful rules. 1. Store entire beans, not ground.If you need to guarantee you blend the freshest glass without fail, at that point store entire beans. Coffee oxidizes decently fast after it has been ground, which is the reason coffee devotees will let you know there is no other alternative than pounding at home. 2. Utilize coffee beans inside two weeks.Coffee beans are best expended inside a specific day and age after they are broiled, and on the off chance that you keep them for a really long time, they will in the end go stale, something that will seriously affect the essence of your drink. Drinking your coffee inside two weeks of the meal date is a decent dependable guideline. What's more, on the off chance that you don't live near a roaster where it's anything but difficult to frequently stock up on crisply simmered beans, there are a lot of cooking organizations that will send specifically to your entryway. Having great coffee close by has never been less demanding. 3. Store beans in a spotless, sealed shut container.Just like you wipe your coffee brewer out, you need a perfect holder to put your beans in. You can store your beans clinched that they came in, however a few packs complete a superior employment of ensuring the beans than others. On the off chance that the coffee arrives in a resealable pack with a firm seal, you're ready. Something else, select a glass bump with a top. It can be as basic as reusing a glass jolt that something different came in, simply make sure to get it out first so there are no leftover odors from whatever was in it some time recently. 4. Put the beans in a cool, dull place.While coffee plants require sun to develop, your broiled coffee beans won't do as such well in daylight. So don't store those beans on the windowsill! A pantry is an extraordinary place to store beans. |
